A kitchen works because of what is inside the cabinets, not the colour of the fronts. Seven storage solutions for a bespoke kitchen, plus a zone-planning checklist.
Kitchen storage shapes everyday comfort far more than the colour of the fronts, yet it usually comes last — once the cabinet layout is fixed. In a bespoke kitchen that is a waste, because the whole advantage of made-to-measure joinery sits inside the cabinets, not on their surface. Below are 7 solutions that genuinely change how a kitchen works, plus a checklist for planning the zones.
Why kitchen storage is planned before the fronts
A bespoke kitchen differs from a ready-made one not in colour, but in that the inside of every cabinet can be designed around specific objects and a specific user. If the interior fit-out is considered only after the volumes are approved, the joinery becomes an expensive box with accidental contents.
The first reason to start from the inside: usable capacity is not the same as cubic volume. A cabinet with shelves and a cabinet with drawers hold the same amount of air, but you use them differently — the back of a shelf requires reaching in and bending down, while the back of a drawer only requires looking.
The second reason is the order of the zones. A well-planned kitchen runs from supplies, through dishes and washing-up, to preparation and cooking. If the pans end up on the opposite side of the room from the hob and the cutlery sits far from the dishwasher, every meal adds dozens of unnecessary steps — and no set of shop-bought organisers fixes that later.
The third reason is the cost of change. Fronts and worktops can be replaced, but rebuilding a carcass or adding a pull-out unit where shelves were planned effectively means a new piece of furniture.
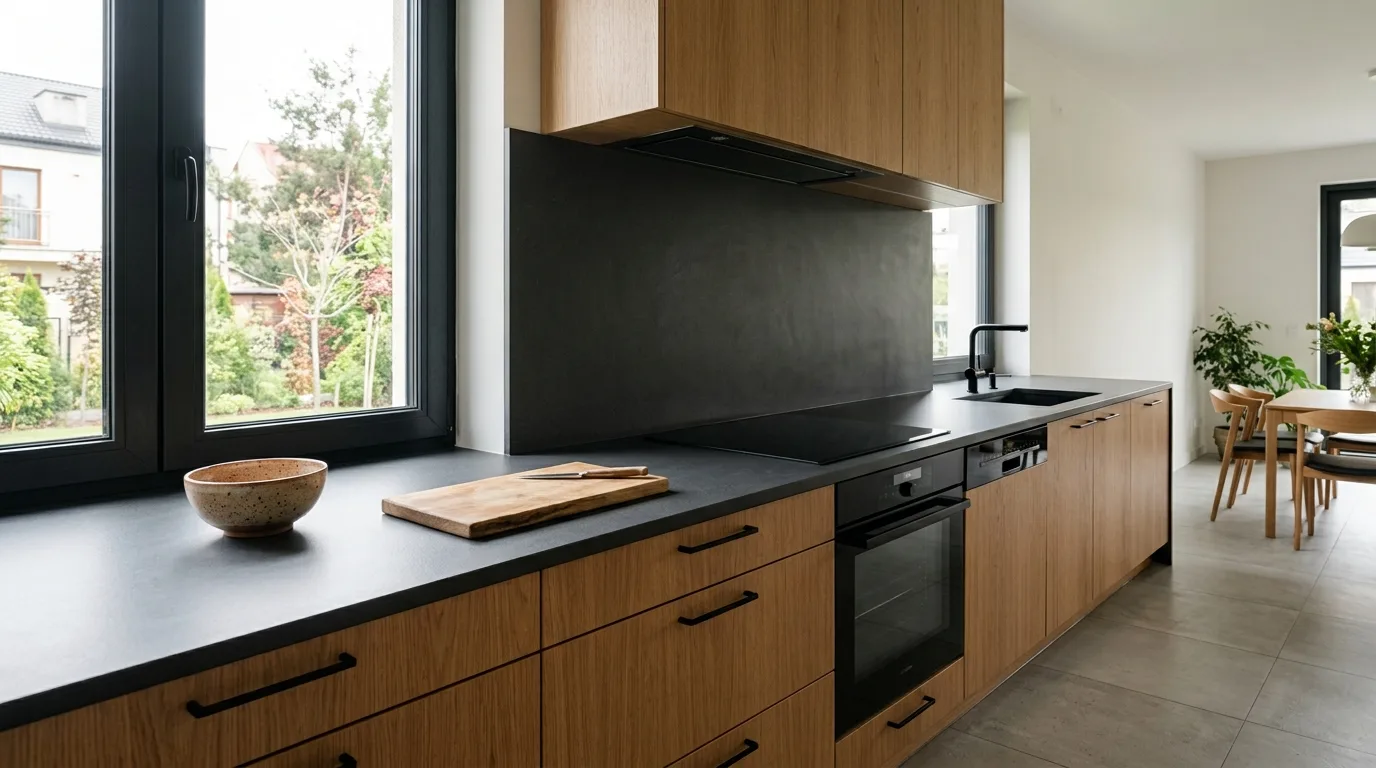
The fourth reason is less obvious: order on the worktop. A kitchen looks tidy not when the worktop is empty in a photograph, but when every appliance has a place within arm's reach. The coffee machine, the blender and the spices stay out because putting them away is inconvenient, not because there is no room. If you are also planning the working area, it is worth reading how to choose the worktop and the wall above it — those decisions are made at the same moment as the cabinet layout.
7 storage solutions for a bespoke kitchen
Not every solution on this list belongs in every kitchen: a layout for two people who cook once a day is planned differently from one for a family that buys a week's supplies at a time. The seven points below are ordered from universal changes to targeted ones — for narrow kitchens, deep corners and flats where every centimetre of height counts.
1. Drawers instead of shelves in the base units
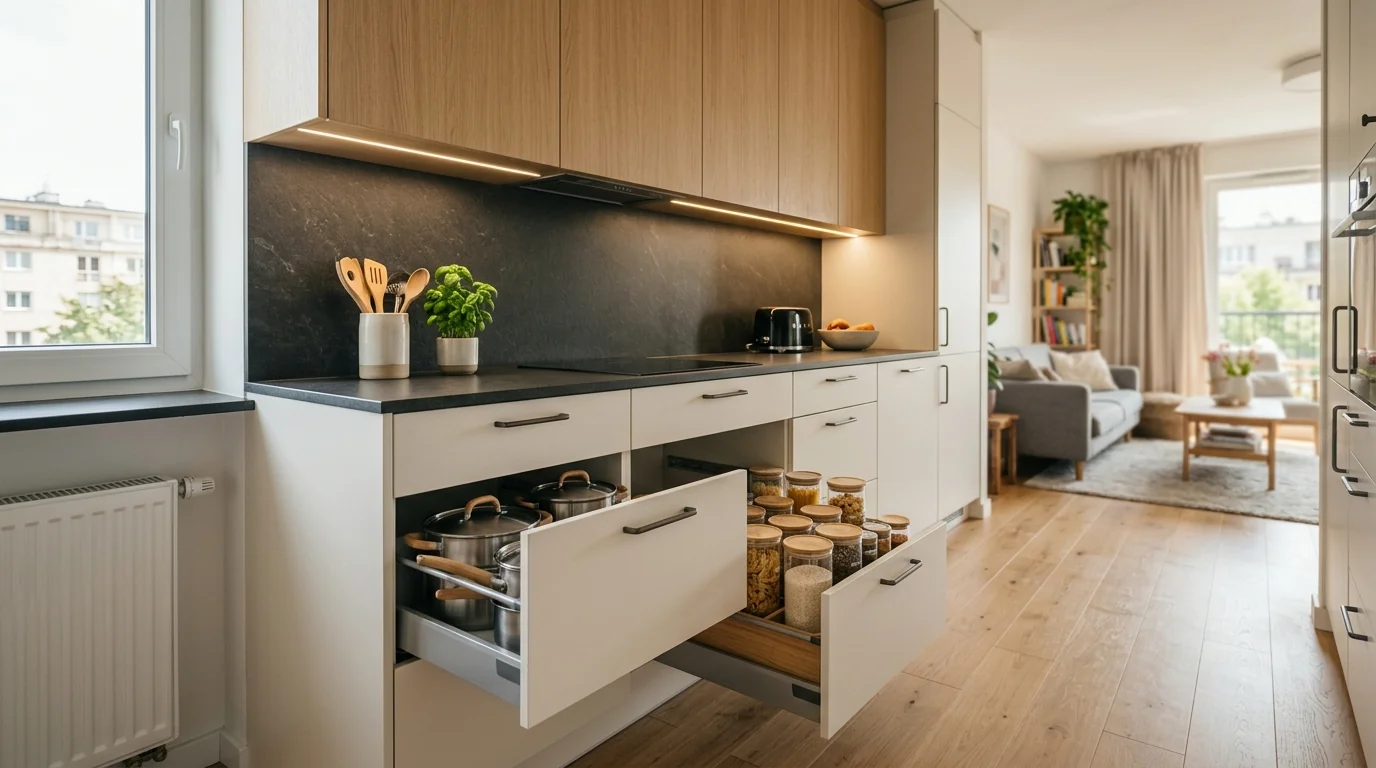
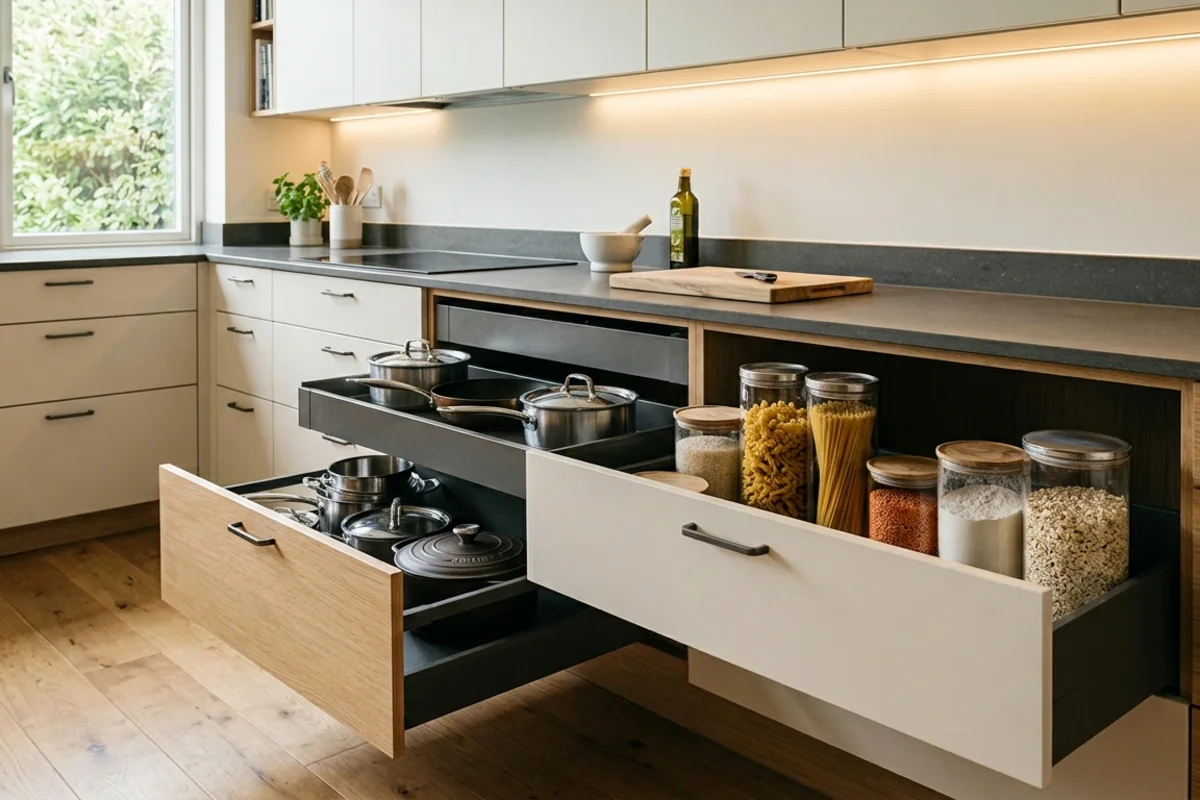
The simplest and most noticeable change in a kitchen: base cabinets with no shelves, built entirely as drawers. Instead of kneeling and searching in the dark, you pull the contents out and see everything from above. In practice you then use the full depth of the unit, including the rear zone that stays untouched most of the year in a cabinet with a shelf. A proven arrangement is one shallow drawer for cutlery, with two deep drawers above it for pans, pots and dry goods. Pay attention to the runners: full extension and European-class load rating are the difference between a drawer that still opens with one finger years later and one that starts to sag. One honest drawback: drawers cost more than shelves, which is the most common reason ready-made kitchens do not have them.
2. Narrow pull-out units: 15 and 20 cm
Almost every project leaves a strip of a dozen or so centimetres too narrow for a full cabinet — against a wall, beside the fridge, in the corner by the window. A narrow pull-out turns that offcut into proper storage for oils, bottles and spices. What matters is not the width but the construction: a basket fixed to the front with runners on both sides stays stable far longer than a suspended version, especially with bottles. In a narrow kitchen a pull-out also beats a hinged cabinet, because it needs no space for a swinging door. Plan it close to the cooking zone rather than at the end of the run: it only makes sense when oils and spices are within reach of the hob.
3. A corner with no dead space
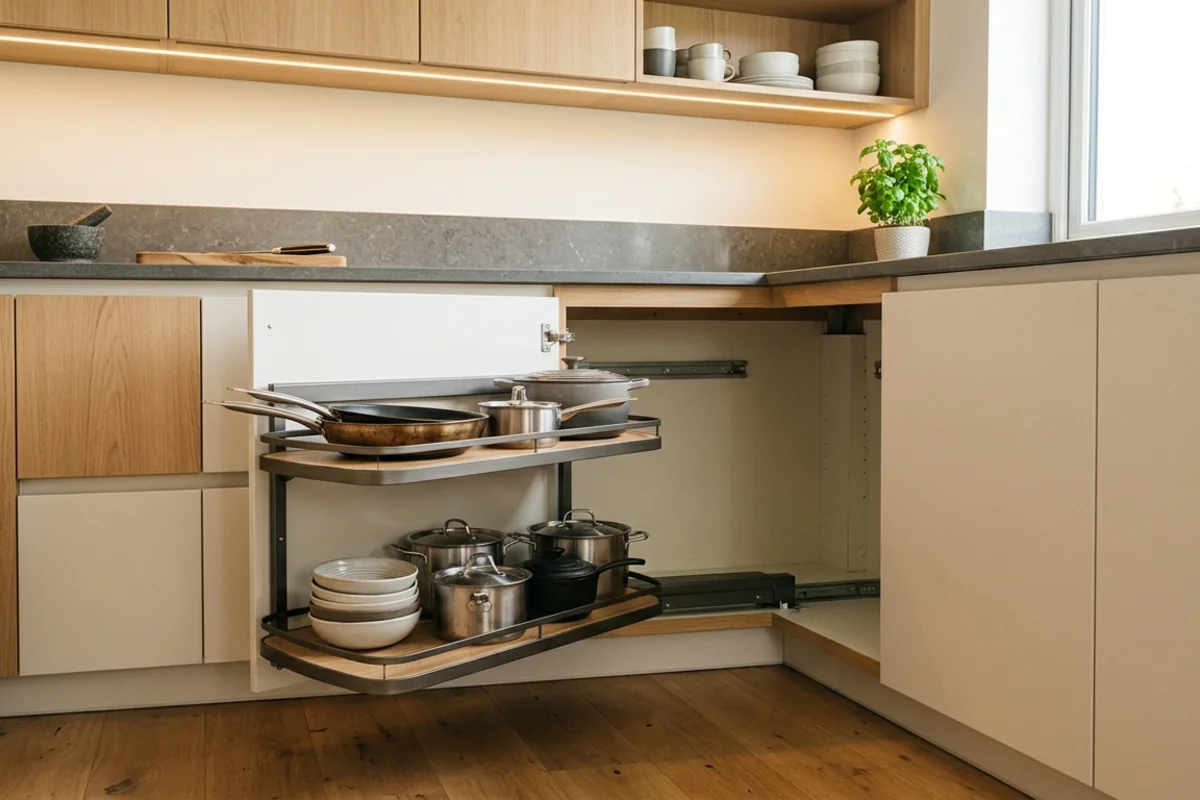
The corner is where ready-made kitchens lose the most room. A standard corner cabinet with a shelf has a deep pocket you have to reach into up to the elbow, so it fills with things nobody uses. In bespoke joinery there are three sensible answers. The first is a pull-out mechanism that brings the whole contents out in one movement — the most convenient and the most expensive. The second is a rotating shelf: cheaper, good for pots, but losing some capacity to the mechanism itself. The third, often overlooked, is giving up the corner cabinet altogether, closing the angle with a blind panel and moving the recovered centimetres into drawers on both sides — sensible in small kitchens, where a corner mechanism costs more than the convenience it delivers.
4. Drawer-in-drawer and internal inserts
A deep drawer with no divisions behaves like a shelf within six months: everything lies in layers, with whatever was used last on top. The answer is dividing the interior — an inner drawer sliding above the main contents, plus inserts matched to what you actually keep. A cutlery tray is obvious, but the real difference comes from dividers holding lids upright, pegs that keep plates in place and flat trays for spice jars. In a bespoke kitchen the inserts are made to the internal dimensions of the carcass, so there are no gaps for small items to slip into. Decide in advance what goes into which drawer — the designer will then set front heights around real contents, not by eye.
5. A larder unit and cabinets up to the ceiling
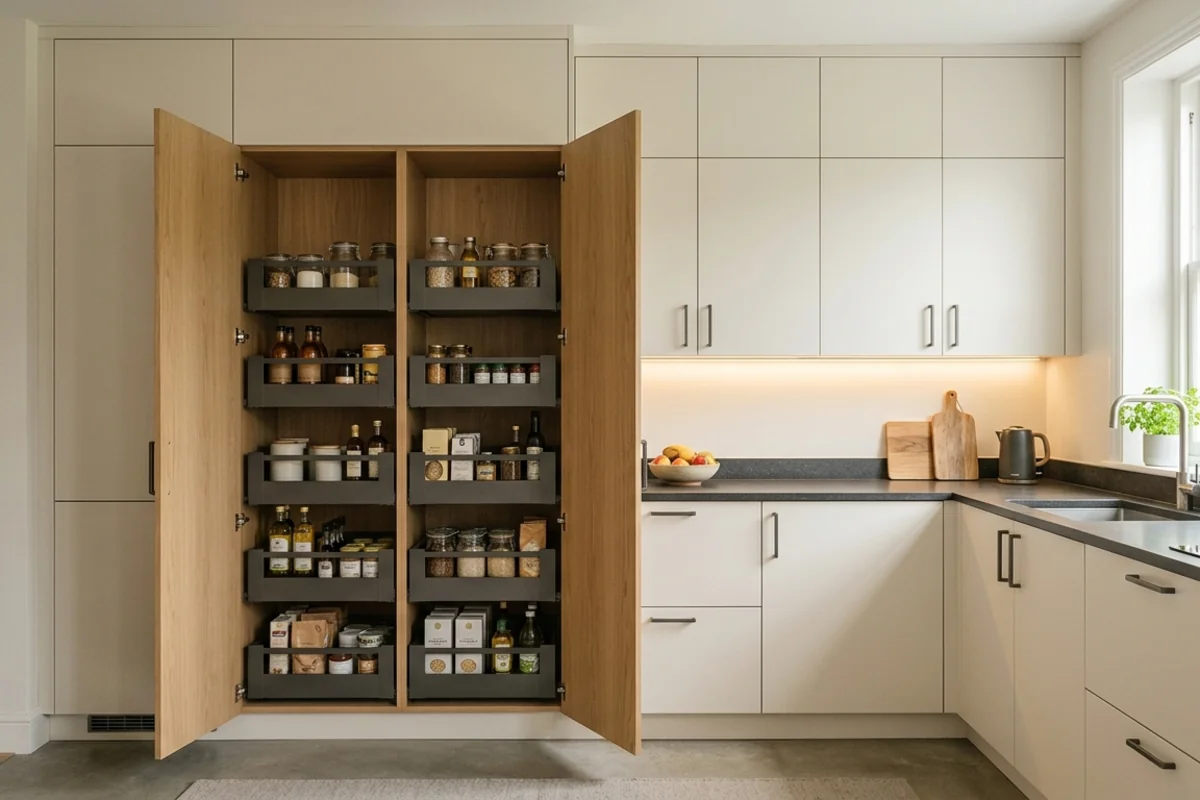
Tall units give the most capacity per square metre of floor, yet in many flats they stop at eye level, leaving a dust shelf above. Taking the fronts to the ceiling closes that problem: the top shelf becomes storage for seasonal items. A separate matter is the larder unit — a tall cabinet with pull-out baskets keeping the entire dry-food supply in one place instead of scattered around the kitchen. Its advantage is visibility: you pull it out and see the stock without unpacking. Just remember that uneven walls in older buildings call for a masking strip at the top — better allowed for in the drawings than improvised on site.
6. The sink zone: waste sorting and cleaning products
The cabinet under the sink is the messiest in the kitchen, because it is the only one whose shape is dictated by plumbing: the trap and waste pipe take the middle, which makes a shelf there almost useless. The answer is a drawer cut out around the trap, or a pull-out sorting system — the number of bins should follow the rules in your building, not a ready-made catalogue set. The second element is cleaning products: a pull-out tray or rails on the inside of the front keep bottles from tipping over. It is also worth specifying a moisture-resistant base and a removable tray protecting the carcass in case of a leak — cheap at the design stage, decisive for how long the cabinet lasts.
7. A double-sided island and a plinth drawer
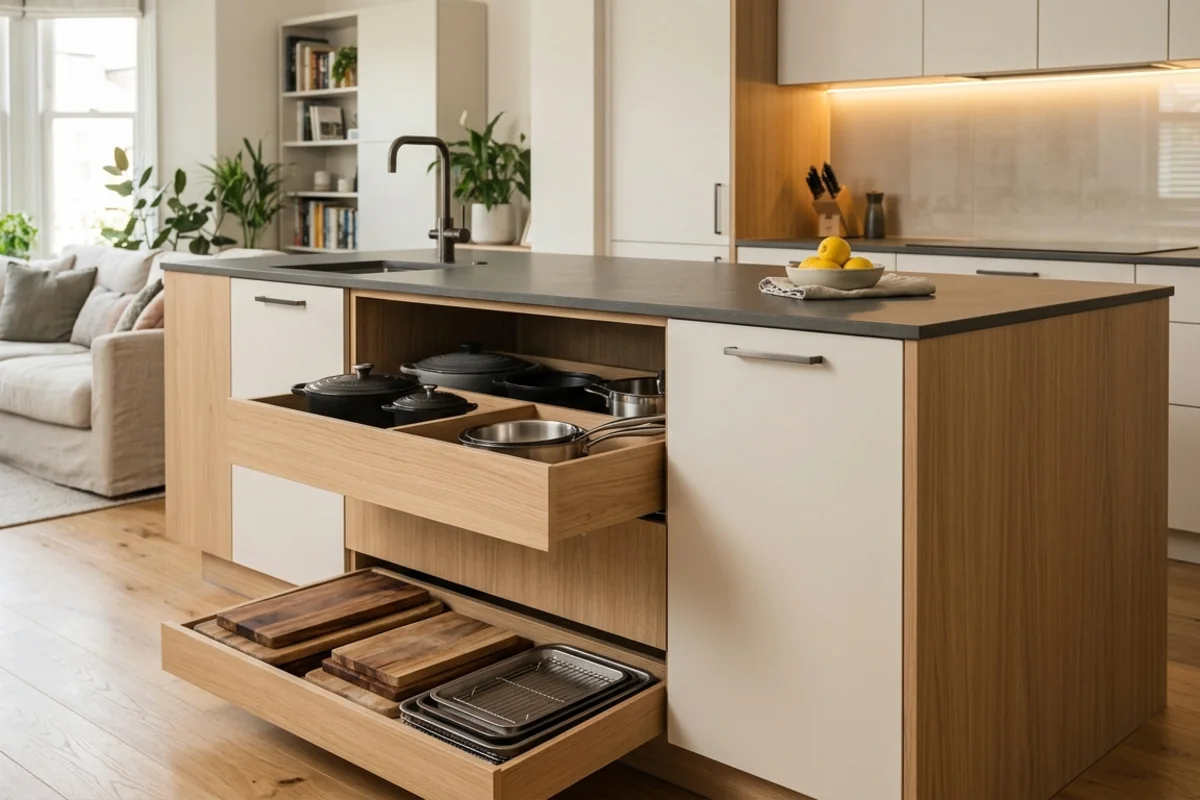
An island is usually treated as a work surface, and its lower half often gets used from one side only. Double-sided joinery changes that: drawers for pots and appliances on the kitchen side, shallow cabinets for tableware or non-cooking items on the living-room side. The second idea, literally underfoot, is the plinth drawer — the band of a dozen or so centimetres below the base units that is normally just a skirting strip. Flat plinth drawers take baking trays, boards and platters; in small flats this is one of the few ways to add capacity without losing floor area. We described the same "every centimetre works" logic in the piece on transformer furniture for new-build apartments.
How to plan the storage zones in your kitchen
Before deciding which solutions go into the design, answer a few questions — they usually change the layout more than any trend does.
- How many people cook at once? With two people at the worktop you need two independent routes to cutlery, spices and the bin, otherwise the whole kitchen converges on one point.
- Do you stock up or shop daily? A big weekly shop argues for a larder unit; daily shopping at the local shop argues for more drawers in the working zone.
- Which appliances stay on the worktop permanently? A coffee machine, kettle or toaster needs a planned socket and clear space. Everything else should have a cabinet you can reach without effort.
- How high can you reach without a step stool? This question decides how tall units are divided: everyday storage up to shoulder height, seasonal above, heavy items always low.
There is no universal layout — only one matched to a specific flat and a specific way of cooking.
The most common mistakes in storage planning
From conversations with clients who come to us after a first, not entirely successful kitchen, the problems rarely concern materials — more often the order of decisions and overlooked details.
- Designing from the look, not the contents. A symmetrical division of fronts looks good in a rendering, but drawer heights should follow what will stand inside them — otherwise the pots miss by two centimetres.
- Forgotten sockets and cabling. Appliances inside cabinets, chargers in a drawer, lighting under the wall units — all of it needs power points planned before installation, not after.
- Opening conflicts. An island drawer blocked by an open oven door, or a pull-out that cannot come out while the dishwasher is open, only becomes visible in a finished kitchen. On a drawing it takes a minute to check.
- Saving on hardware. A carcass and fronts can last twenty years; bottom-grade runners and hinges last far less, and replacing them in a fitted kitchen costs more than the initial price difference.
- No room for non-kitchen things. Bags, tools, pet food, a first-aid kit — better to allow a cabinet for them than to pretend they do not exist.
What it costs and how the project runs
The quote depends on the number of modules, the hardware and the complexity of the joinery — a simple single-run kitchen is calculated differently from a double-sided island with pull-outs and a larder unit. That is why every project is quoted individually after measuring, not from a price list per linear metre. In our experience — more than 300 completed interiors and 3,000 m² of our own production — planning cabinet interiors raises the most questions, because those decisions are felt daily for years.
From approved design to installation, a bespoke kitchen usually takes 2-4 weeks, depending on the material and current production load. The process runs like this: measuring on site to the millimetre, agreeing the zones and the contents of each cabinet, selecting hardware and inserts, drawings with socket positions, production, installation and front adjustment. The more that is known about the contents at the drawing stage, the fewer compromises at installation.
You can see how these solutions look in finished interiors in our portfolio and among our projects for the home. And if you are still weighing up the finish of the fronts, our piece on choosing matte or gloss kitchen fronts will help.
If you are planning a bespoke kitchen in Warsaw and do not know where to start, begin with our short style-matching quiz — it will narrow the choice before you sit down with a designer.