Good kitchen design ideas start with the layout, not the colour of the fronts. First match the shape of the units to the room width and walkways: single wall, L, U, island or peninsula. Then come floor-to-ceiling units, appliances in tall housings, colour and the empty wall. Nine of the ten ideas come from our portfolio.
In this article
Good kitchen design ideas start with the layout, not the colour of the fronts. First match the shape of the units to the room width and walkways: single wall, L, U, island or peninsula. Then come floor-to-ceiling units, appliances in tall housings, colour and the empty wall. Nine of the ten ideas come from our portfolio.
Three numbers settle most decisions. Leave at least 107 cm (42 in) between worktops when one person cooks and 122 cm (48 in) when two do. Place the fridge, sink and hob so that the route between them and back to the start stays within 7.9 m (26 ft) in total. These figures come from kitchen design practice and are not a Polish building rule. The third number is the width of your kitchen. In the example below, an island needs 369 cm from wall to wall if there is to be a walkway behind the bar stools.
Before you pick an idea: measure the kitchen and walkways
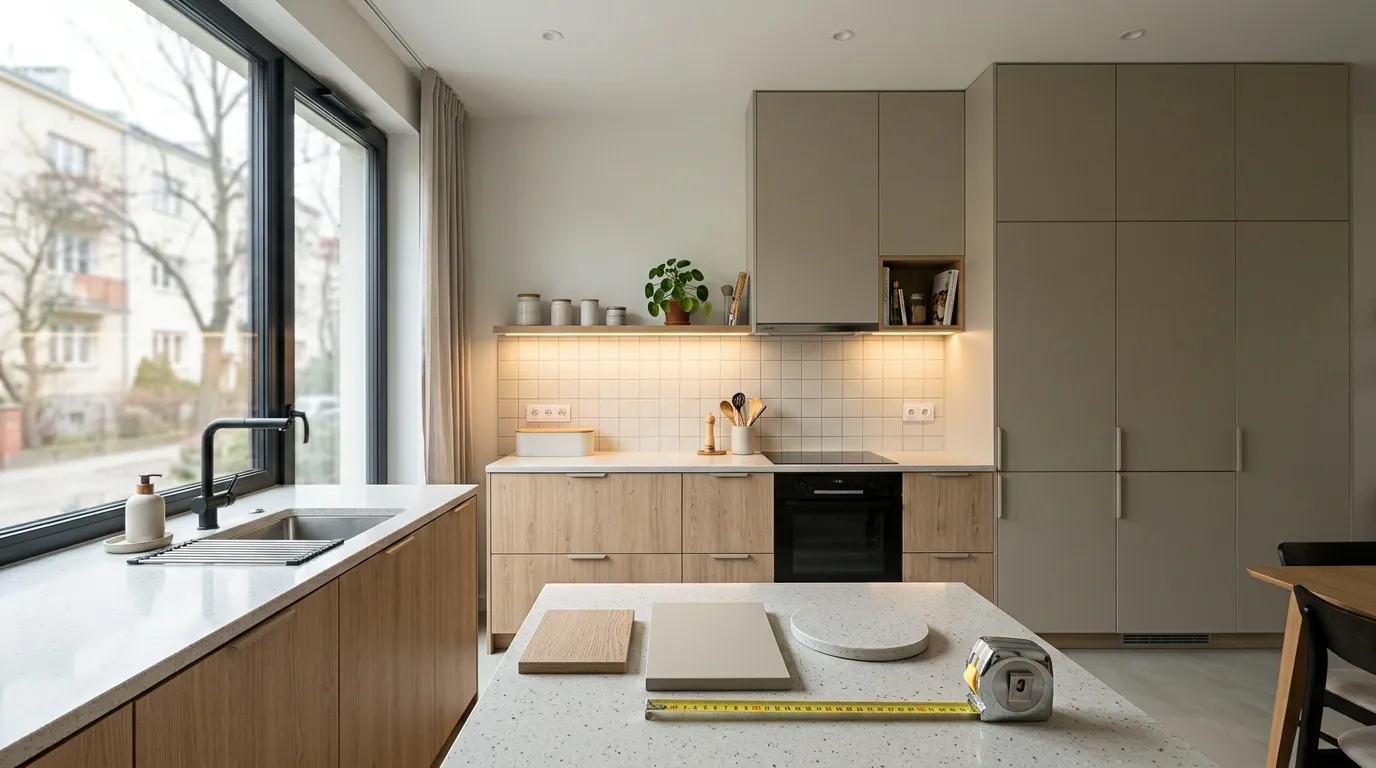
An idea from a photo first has to be translated into the centimetres of your own room. Three measurements are enough: the length of each wall, the width of the room and the position of fixed points, meaning windows, doors, the water riser and the ventilation duct. With these numbers you can see straight away which of the ten ideas are possible at all.
A tape measure and a sheet with a floor plan will do, plus the windowsill height and the direction the door opens. The exact dimensions are later taken during a free laser survey.
The key clearances to leave:
| What we measure | How much to leave | Notes |
|---|---|---|
| Work aisle between worktops, one cook | min. 107 cm (42 in) | measured between fronts, tall units or appliances |
| Work aisle, two cooks | min. 122 cm (48 in) | as above |
| Regular walkway | min. 91 cm (36 in) | people pass here but do not work |
| Each leg of fridge–sink–hob | 1.2 m to 2.7 m (4 to 9 ft) | measured from the centre front of the appliance |
| Sum of the three legs | max. 7.9 m (26 ft) | no leg should cut through an island by more than 30.5 cm (12 in) |
In a narrow kitchen the absolute minimum walkway between an island and the cabinets is 80 cm. It is more comfortable to plan by the values in the table, because they are measured from the fronts and depend on the number of cooks.
Services are set together with the furniture design. Water, drain, power and ventilation must come out where the kitchen design needs them. That is why the furniture design is best ready before the renovation crew closes up the services in the walls.
Moving walls, gas or a ventilation duct is a job for the utilities designer and the building manager, not the furniture maker. These decisions are made before the cabinetry design.
Kitchen layout ideas 1–4
The shape of the units depends on the room width and on how many people cook. A single-wall layout fits almost anywhere. An L needs two free walls, while a U and a galley also need a 107–122 cm aisle between the runs. An island takes the most space, because a walkway must be left behind it too.
1. Single-wall kitchen in an alcove
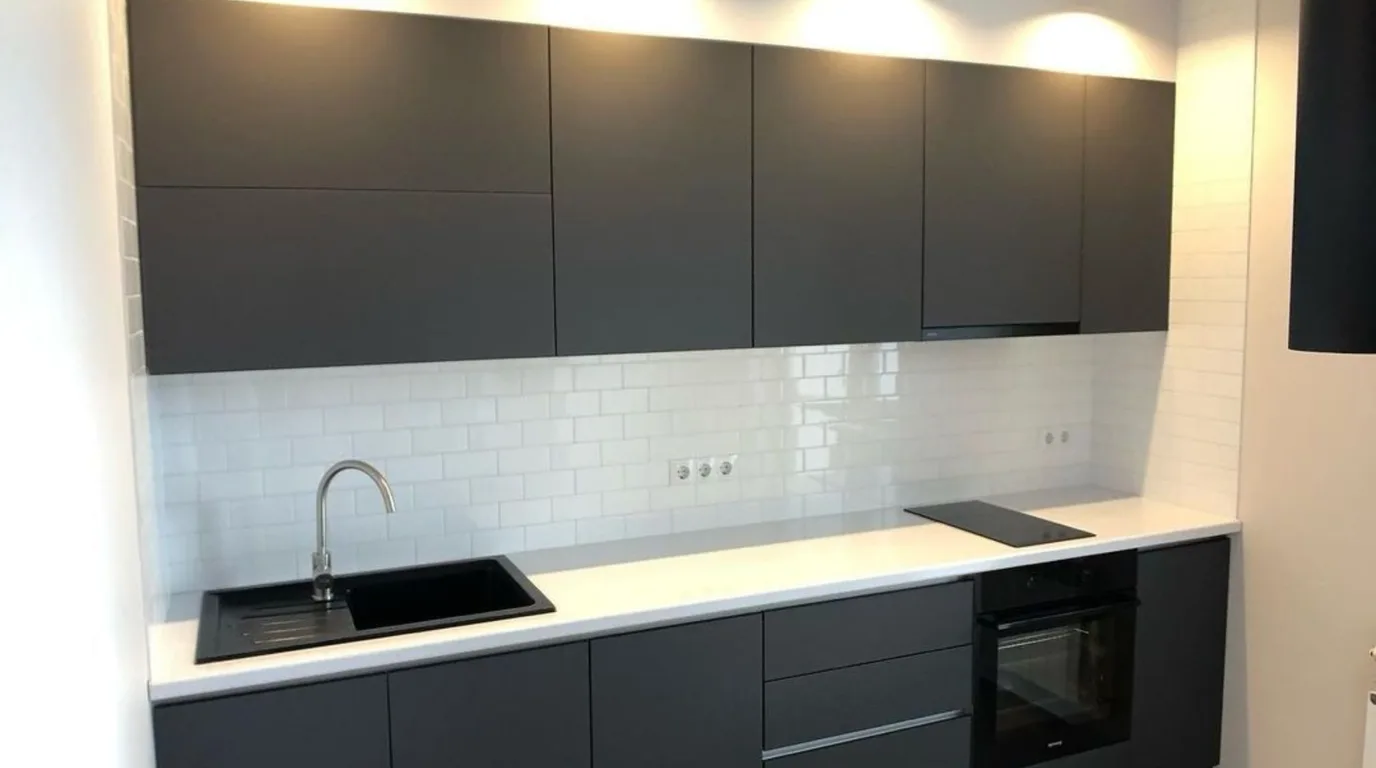
The sink, the work surface and the hob stand in one row, in the order you cook. That is how we built the "Modern graphite kitchen" in a wall-to-wall alcove. We left the longest stretch of worktop between the sink and the hob. Below it sits a three-drawer base unit, and the oven is tucked under the hob. The dish drainer is in a cabinet with a lift-up door above the sink, and the extractor in the unit above the hob.
This layout suits an open-plan kitchen-living room where one wall is available for units. Its weak point is the lack of a work triangle. So put the sink in the middle, between the fridge and the hob, to keep both close at hand.
2. L-shaped kitchen
Two runs at a right angle give a work triangle without an extra aisle. In our "Modern kitchen in graphite and wood" the L is closed off by a floor-to-ceiling tall unit. In the "White neoclassical kitchen" the same layout got two rows of wall cabinets.
The hardest spot in an L is the corner. Off-the-shelf modules often leave dead space there. A bespoke kitchen fills it with pull-out baskets or a cabinet fitted to the real angle of the walls. More options are in our article on bespoke kitchen storage.
3. U-shape or two facing runs (galley)
A U-shaped layout gives the most worktop and storage in a closed kitchen. A galley works well in a long, narrow room. In both cases comfort depends on the gap between the runs: 107 cm for one cook and 122 cm for two. If the room is narrower, it is better to drop one run and switch to an L. This gains about 60 cm, the depth of a base unit with worktop.
We do not show this layout as a separate project from our portfolio.
4. Island
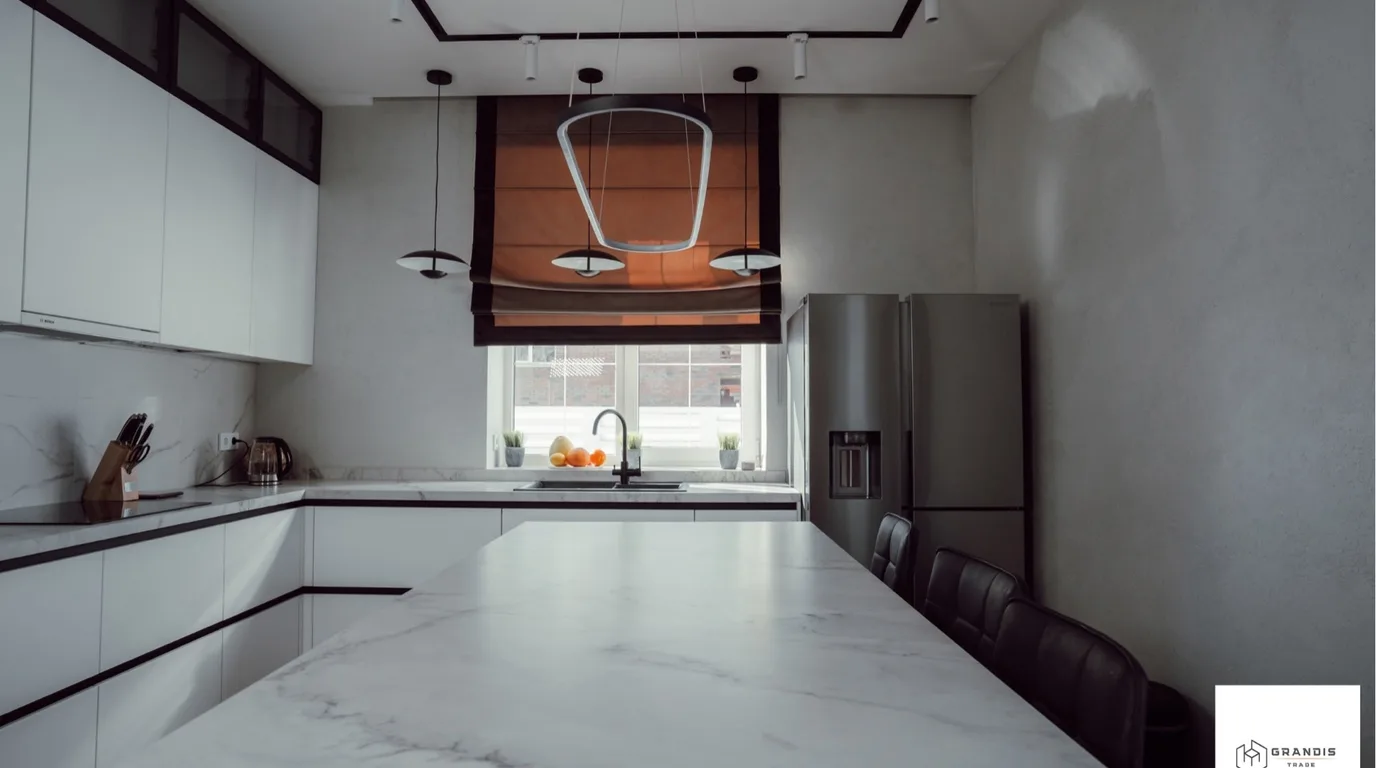
An island adds worktop and seating, but takes the most floor space. In the "White kitchen with a marble front" the island has two rows of wide drawers on the working side and room for bar stools facing the living room. In the black matte kitchen with an island the hob has a built-in downdraft extractor, so no hood hangs over the island. We hid the sockets in a pop-up block in the worktop.
The room width an island needs is simple addition. Here is an example for a kitchen where one person cooks and someone walks behind the bar stools:
| Element | Size | Source |
|---|---|---|
| Units along the wall | 60 cm | typical depth of a base unit with worktop |
| Work aisle, one cook | 107 cm | design practice |
| Island with knee overhang | 90 cm | sample depth |
| Zone behind seated diners, someone walks past | 112 cm | design practice |
| Total | 369 cm | 60 + 107 + 90 + 112 |
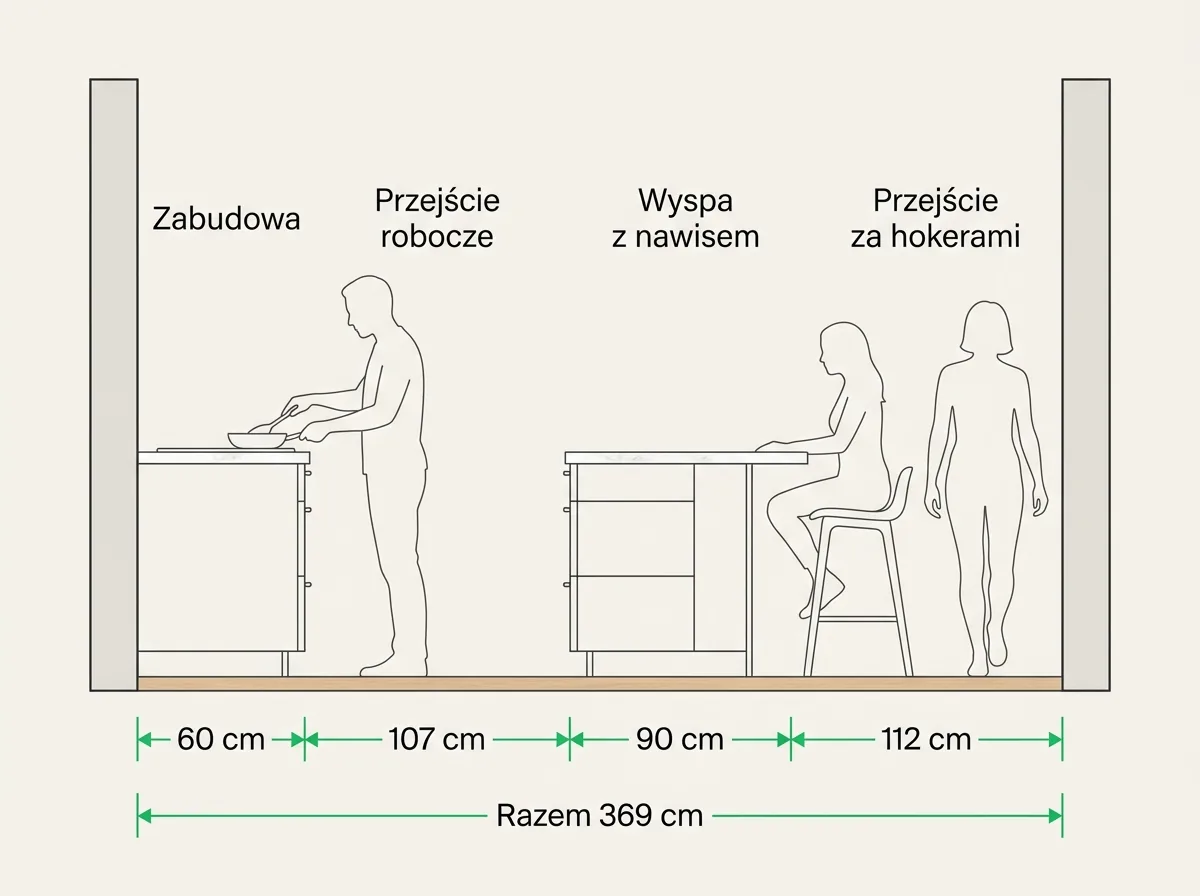
If an open living room starts behind the island, the last row drops out and 257 cm is enough. When nobody walks behind the seated diners, 81 cm is enough instead of 112 cm.
Leave a walkway behind the island too. In the example above, an island with a walkway behind the stools needs 369 cm from wall to wall. In a narrower kitchen, a slimmer island or a peninsula works better.
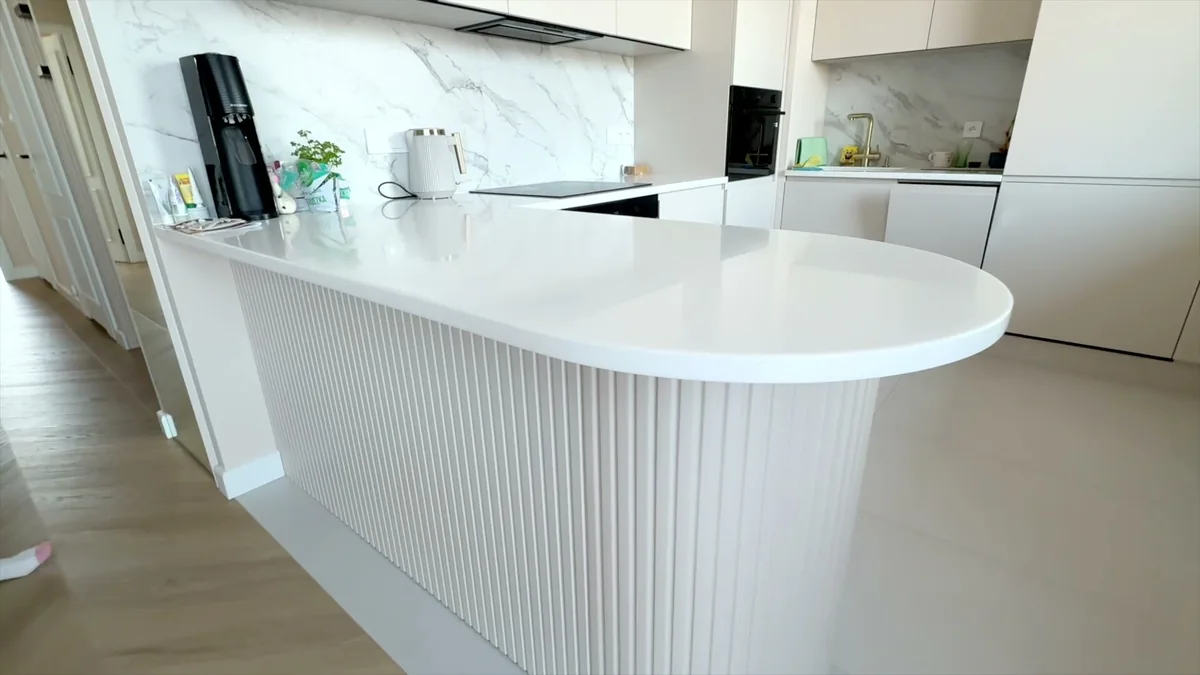
When you are short by ten or twenty centimetres, the answer is a slimmer island or a peninsula. A version with a rounded end that is easy to walk around is shown in our project "Kitchen island with a curved form and fluted front".
Where to sit: a peninsula instead of a table (idea 5)
A peninsula is a worktop that extends from the units and is attached to them at one end. It gives you a place to eat without a separate table and takes less floor space than an island. Allow 61 cm of worktop width per seated person. The knee space depth depends on the worktop height.
In the "Grey-beige corner kitchen with marble" the peninsula extends from the shorter run of the L. It stands on a thin black frame. Its glossy black worktop matches the working run. There are no cabinets underneath, so you can sit on any side. In an apartment in Warsaw's Wilanów district, the peninsula got a fluted front and a worktop with a curved end. There is no sharp corner on the walkway.
How much space to plan for seating:
| Worktop height | Width per person | Knee space depth |
|---|---|---|
| 76 cm / 30 in (table) | 61 cm / 24 in | 46 cm / 18 in |
| 91 cm / 36 in (kitchen worktop) | 61 cm / 24 in | 38 cm / 15 in |
| 107 cm / 42 in (bar counter) | 61 cm / 24 in | 30.5 cm / 12 in |
Behind seated diners you leave 81 cm if nobody walks there. For someone to squeeze past you need 91 cm, and to walk past freely, 112 cm.
Storage and appliances: ideas 6–7
Floor-to-ceiling units and appliances grouped in tall housings let a kitchen hold more and look calmer. The first idea uses the strip below the ceiling that stays empty with off-the-shelf modules. The second frees up the worktop, leaving only the hob and the sink on it.
6. Floor-to-ceiling units in two rows
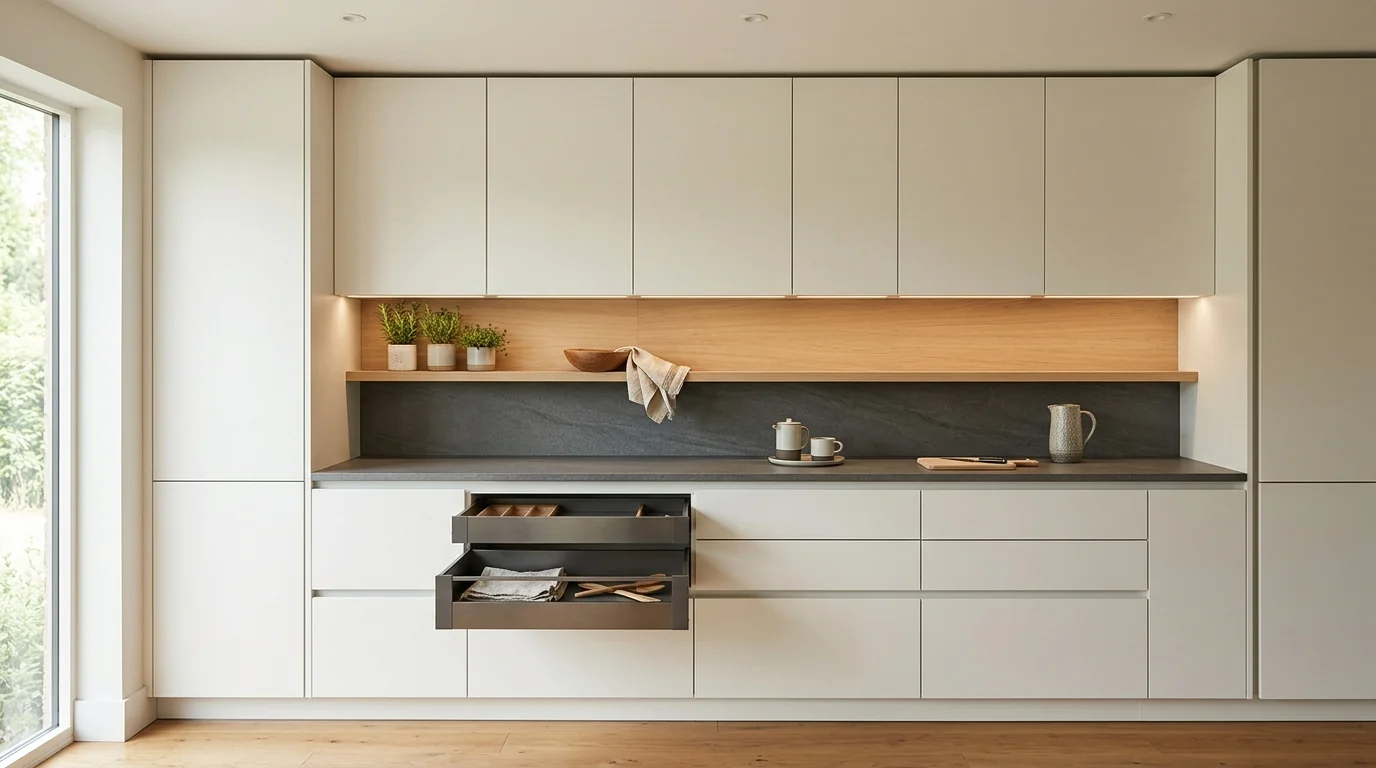
In the "White neoclassical kitchen" we split the upper part into two rows. The lower row opens sideways. The top boxes above it, low cabinets right under the ceiling, open upwards on lift mechanisms. Open doors in both rows do not get in each other's way, and no dust collects on top of the cabinets.
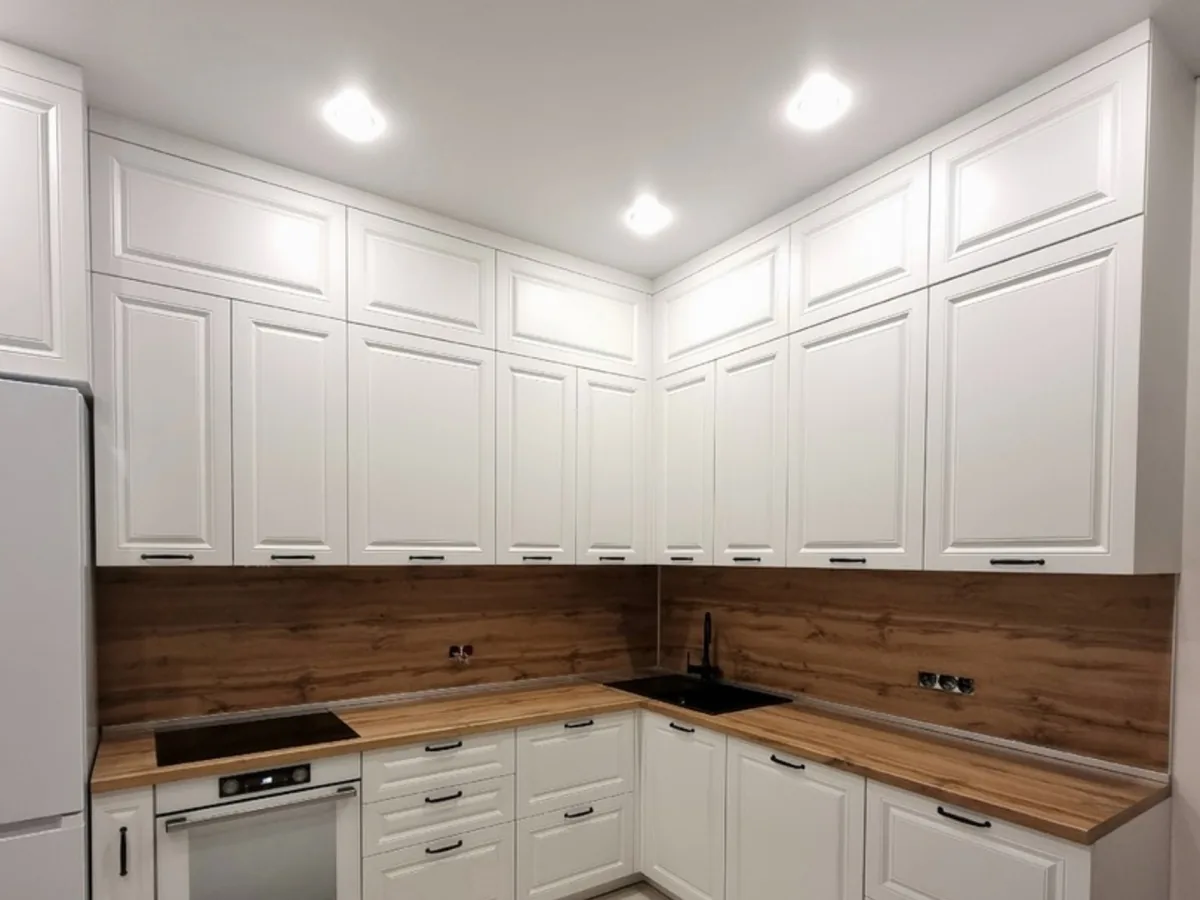
In the "Gloss and dark wood kitchen" the wall cabinets form three horizontal rows of white handleless gloss. The gloss reflects window light and makes the units feel lighter. Under wall cabinets it is worth planning worktop lighting from the start. We cover the principles in our article on task lighting in the kitchen.
7. Appliances in tall housings
A tall housing unit is a cabinet from floor to ceiling that takes a built-in fridge, oven or microwave. In the "Gloss and dark wood kitchen" all the large appliances sit in one block of tall units. The microwave and oven are stacked at a comfortable height, so you do not need to bend down to reach it. Under the built-in appliances we left ventilation grilles in the plinth.
With tall units we follow one rule. A full-height cabinet or the fridge should not separate the two main work areas, such as the sink and the hob. That is why the tall unit goes at the end of the run, as by the window in the "Grey-beige corner kitchen with marble".
The look: kitchen design ideas 8–10
Once the layout is set, three decisions complete the kitchen design. You need to decide how the kitchen should look from the living room, how to spread the colours and what to do with the empty wall. This is the stage where inspiration photos help most, because the dimensions are already fixed.
8. An open-plan kitchen that looks like furniture
In the black matte kitchen with an island, almost the whole wall is smooth fronts from the floor, in the colour of the window frames. We marked out the sink area with a recess framed in an oak decor, with a panel above the worktop and spot lighting. The warm wood breaks up the black surface and shows at once where the water is.
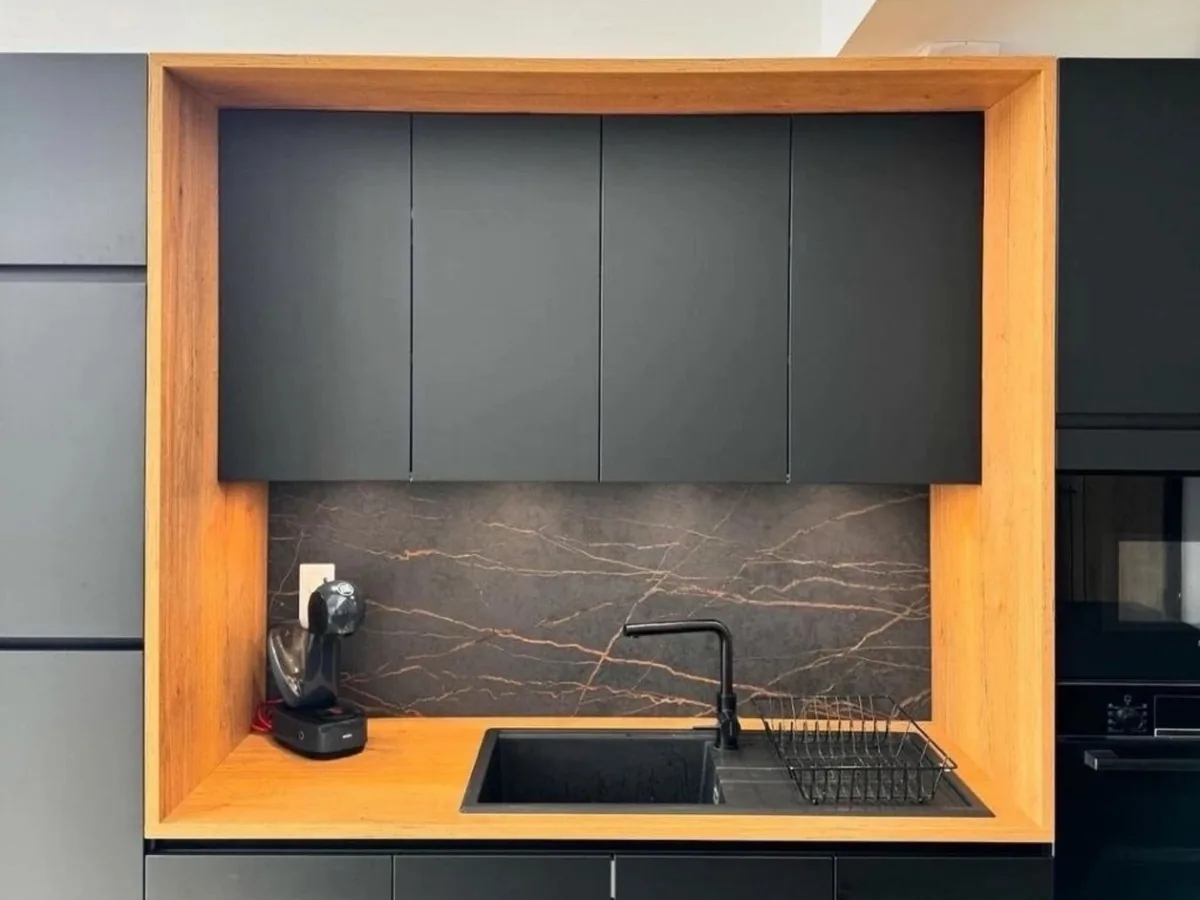
Smooth handleless fronts are a common choice for a kitchen seen from the living room. We compare the pros and cons of both options in our article on kitchen handles.
An open kitchen also has everyday costs: smells, the noise of the dishwasher and extractor, dishes on show.
If you fry food often at home, consider a layout that can be at least partly separated from the living room.
9. Colour that does not overwhelm
A dark kitchen need not feel heavy if the colour is spread across levels. In the "Modern kitchen in graphite and wood" the top is graphite and fluted, the bottom is in an oak decor, and the white worktop with the wall above it forms a light band in the middle. Two display cabinets with fluted glass and lit shelves work like lamps in the evening.
Colour can also go on just one piece. The curved island has a sage-green body, surrounded by units in a dark walnut decor. One accent piece brings in colour, while the rest of the kitchen stays calm. A practical detail from the "Gloss and dark wood kitchen" helps when choosing a finish. We made the lower row there in light grey matte, because these fronts are touched most often and fingerprints show less on it. More on this in matte or gloss lacquer.
10. Ideas for an empty kitchen wall
An empty kitchen wall can become storage, light or a place to sit. Full-height units from floor to ceiling with smooth fronts hide supplies and small appliances. That is what we did in the black matte kitchen with an island, where the living room sees a single calm surface. A glass display cabinet with lit shelves shows off tableware and softly brightens the room in the evening. A narrow counter or a peninsula along the wall turns it into a breakfast spot, as long as the walkway from the table above remains.
The wall above the worktop is a separate topic, because it has to withstand moisture, grease and heat. We collected materials and ideas for it in our article on the worktop and the wall above it.
How to make your chosen idea bespoke
We make a bespoke kitchen in five steps: a conversation, a laser survey, a design with visualisation and quote, a contract with production, and fitting. Production usually takes 2–4 weeks after the design is approved and the deposit paid, and the exact date goes into the contract.
- Conversation and brief. The easiest start is our short form, a phone call or WhatsApp at +48 573 504 292. Wall dimensions, photos of the room, a list of appliances to build in and the ideas from this article you like will all help.
- Survey at your home. The survey is done with a laser and is free. All we need is access to the room.
- Design with visualisation and quote. The visualisation shows real dimensions, the chosen decors and a view of every wall. At this stage you can change the layout, heights, colours and the division of fronts.
- Contract and production. The contract sets a fixed price and date. Non-standard fronts and stone worktops extend production, and we account for this in the date.
- Delivery and fitting. Our own in-house team does the fitting. A kitchen with worktop and appliance connection usually takes one to two days. Walls and floors must be finished by then, and services in place. After fitting we clean up and sign the handover report with you.
The price of a kitchen depends on decisions made in the design, not on floor area alone. It is made up of the carcass and front material, the type of finish (laminate, veneer, lacquer), hardware and mechanisms, and the complexity. Slopes, corners, floor-to-ceiling units and non-standard sizes raise the cost. The worktop, appliances and lighting are priced as separate items. How these factors shape the budget is covered in our article on the price of a bespoke kitchen. We give a binding figure after the survey, and the contract price stays fixed unless the client changes the scope.
Off-the-shelf modules come in fixed widths, so a real flat usually ends up with a gap by the wall, a dead corner or an empty strip below the ceiling. If the modules fill the room without such gaps, a ready-made kitchen will work too.
The best time to start a kitchen design is during renovation, before the crew closes up the services in the walls. That way the connections end up where the sink, dishwasher and hob will stand. You can see the kitchens we have made in the "Projects" section, and the scope of work for flats and houses is described on the page custom furniture for the home. If you already have dimensions and chosen ideas, the design form is the fastest route to a free survey.
This article is for information only and reflects the situation as of 19.10.2026. The dimensions given come from design practice and are not regulations. Price and timing are set in the contract after the survey.
Frequently asked questions
What worktop height is comfortable in a kitchen?
Plan the hob 20 cm below the elbow of the person who cooks, or at 85–95 cm. In a bespoke kitchen the worktop height is set in the design for the people who cook most often. Everyday items are best kept 80–160 cm above the floor.
How should I lay out a small kitchen?
In a small kitchen a single-wall or L-shaped layout with floor-to-ceiling units works best. Units up to the ceiling and top boxes give the most storage on the same floor area. Appliances in one tall housing free up the worktop. An island in a small kitchen usually eats into the walkway, so a peninsula is a better option.
Can a bespoke kitchen fit crooked walls in an older building?
Yes, this is a typical situation. The laser survey shows every deviation, and the design includes cover strips, adjustable plinths and filler panels trimmed on site from the start. That way the units sit against the wall without gaps, even with a difference of several centimetres.
How long does it take to fit a bespoke kitchen?
A kitchen with worktop and appliance connection usually takes our team one to two days. After fitting we remove packaging and waste, vacuum, and check the units together with you before signing the handover report.
Do you make kitchens outside Warsaw?
Yes, we work in other Polish cities and across Europe. The cost of travel and fitting is agreed in advance and included in the quote.
Where can I see photos of bespoke kitchens?
All the kitchens in this article are in the "Projects" section of our website. For each one we describe the layout, materials and what is hidden behind the fronts.